
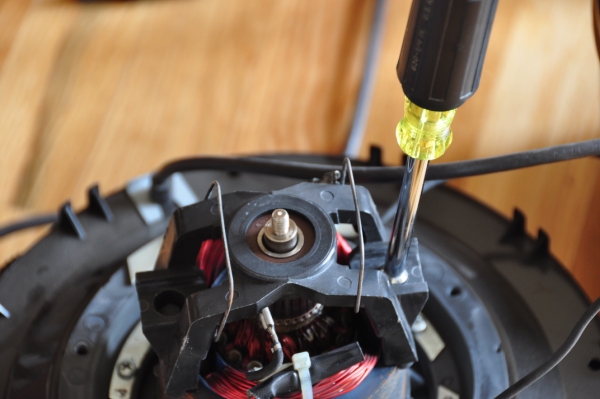
Next, pull
back the Brush Holder Clip wires that secure the brushes to the motor.
Carefully remove the two brushes once they are loose.
With the brushes
removed, use a 1/4" socket type wrench or driver to remove the two
screws that secure the Rainbow vacuum's Bearing Assembly Bridge to the
motor.
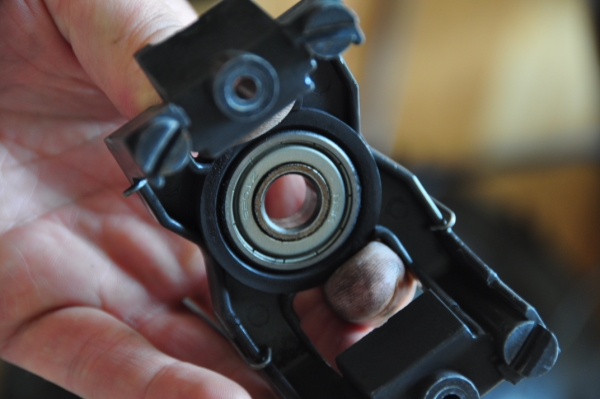
Hopefully
the Bearing Assembly Bridge will slide freely off of the motor shaft.
In this case, it has come free with the top motor bearing still in place
(sometimes the bearing sticks to the motor shaft). If the bearing is stuck
to the shaft, you might have to spend some time very lightly tapping on
it to loosen it. Replace this bearing by putting a new one in the Bearing
Bridge Assembly.
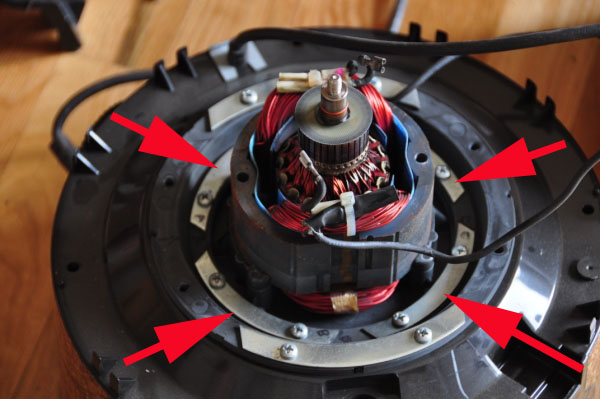
Next, remove
the four metal plates that secure the Rainbow vacuum's motor to the lower
plastic housing. At this stage, you can use a magic marker to mark these
plates and their relative positions on the unit, prior to removing them.
I also mark the motor unit components at all stages of disassembly, so
that I can orient everything in the same way when I put it all back together
again. I also often use a digital camera to document the disassembly of
things I work on, as an aid to help get things put together like they
were originally.

Removing the
metal plates will allow the vacuum's motor assembly to come free from
the upper housing, as shown above.
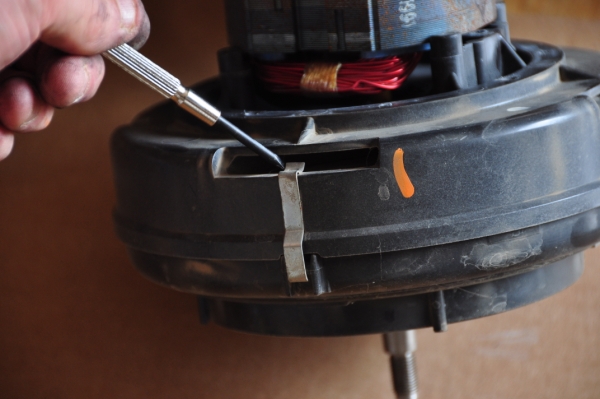
Using a small
flat screwdriver, carefully pry up on the four retaining clips as seen
in this image. Trying to pry these spring clips off from the clip's opposite
end will cause permanent damage to the motor housing. Pry them up only
in the manner shown.
Copyright
2009 Thomas Penrose