| |
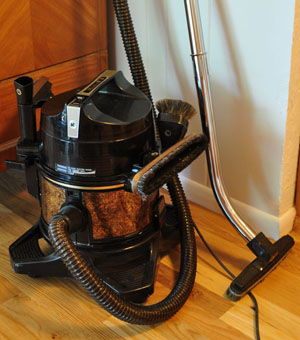
These illustrated
instructions attempt to show how you can replace the three motor bearings
on a Rexair Rainbow D4 or D4SE canister vacuum cleaner. The author assumes
no liability to any damage you cause to your vacuum or yourself by making
use of these instructions. I am not a professional vacuum service-person,
but have replaced motor bearings on numerous Rainbow D4 units, and have
always had great success. R-5238 (and/or R-1981) bearings can be purchased
economically from various parts suppliers online. I tend to prefer to
use bearings that are double-sealed, to help protect them from moisture
intrusion. Some of the parts suppliers online also have .pdf exploded
parts diagrams for all Rainbow models available for free download. Some
aspects of these instructions may also apply to the Rainbow D3 and D2
series, but as I have never worked on those vacuums, I really have no
idea.
In some instances,
your vacuum may have suffered enough corrosion and damage that it cannot
be easily repaired. In other instances, you may have to spend extra
time trying to loosen bearings that are stuck in place on the motor
shaft.
Potential does
exist to ruin your vacuum by attempting to work on it yourself, if the
work is done improperly.
|
|
|
|
|
|
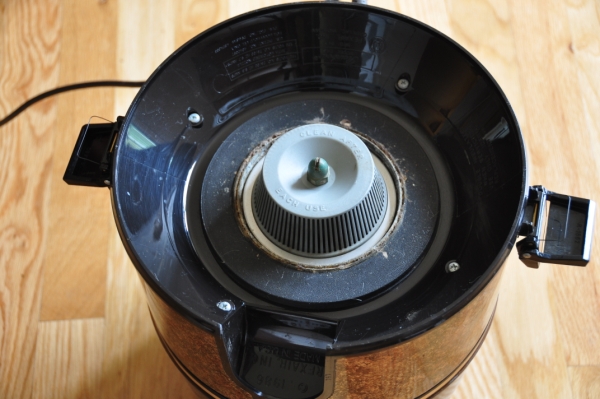
With
your Rainbow vacuum unplugged (never work on it plugged in), start by
removing the Separator, which is the gray basket shaped fan. It is attached
with a brass nut that is removed by turning it counter-clockwise with
a screwdriver. It is important to use a properly fitted screwdriver, be
it either slotted or Phillips, when removing screws in this unit, since
it keeps the screw heads from being ruined, making it difficult or impossible
to properly remove the screw. |
|
|
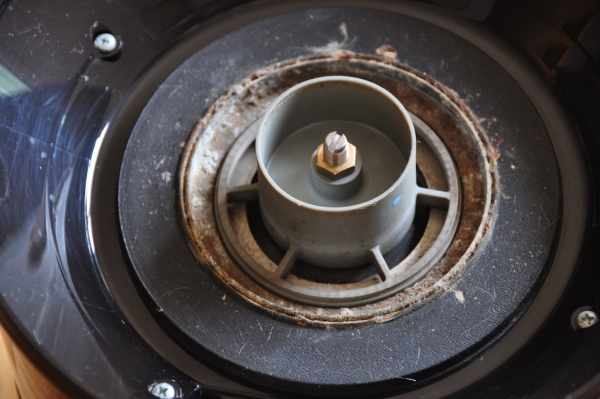
With
the Separator removed, you will next remove the brass nut that secures
the Spider (the gray plastic part). This nut also removes normally, by
turning it counter-clockwise. You will need a large slotted screwdriver
for the slot in the motor's shaft, to keep the motor shaft from turning
as you attempt to loosen and remove the brass nut with a wrench. This
is a common part of the unit that is damaged by using a poorly fitted
screwdriver that is too small. |
|
|
|
|
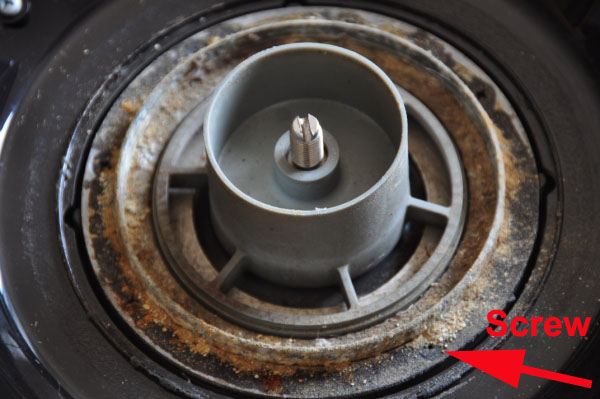
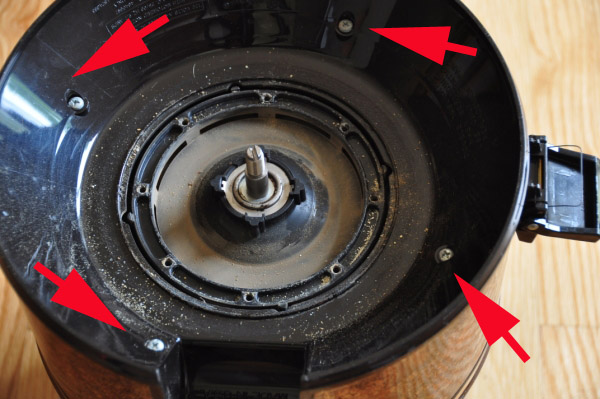
In
the image above, the rubber sealing baffle has been carefully removed
by pealing it away from the contact adhesive that secured it to the unit.
If you remove it carefully you can re-use this baffle without having to
buy a new one from a Rainbow Vacuum parts supplier. Underneath this rubber
baffle are the 8 screws that secure the metal motor gasket flange to the
vacuum, although the screws are often concealed under some of the contact
adhesive (as in this image). To remove these Phillips screws, you will
need a screwdriver that fits them very securely, or you will risk ruining
the screw heads, which will make it very hard to remove these screws to
complete this project. In some cases you will need to use a metal pick/probe
to remove adhesive from the screw heads, and from around the circumference
of the screw head. With the screwdriver in place, you want to bear downward
very hard as you turn the screwdriver, to keep the screwdriver from slipping
out, and chewing up the screw head's slot. If the screw resists turning,
clean it up some more, or perhaps use a pentrating lubricant to help loosen
it. You can also tap on it to help the threads of the screw to unfreeze.
It you are not physically strong, have someone who is help you to remove
these screws. The key is to have a well fitted screwdriver properly seated
in the screw head's slot. |
|
|
Next,
with the metal flange, spider, and lower aluminum plate removed (this
plate is under the plastic spider), next remove the four Phillips screws
that hold the brown Plastic Baffle Plate to the vacuum. Carefully lift
this plastic plate up and out of the way. |
|
|
|
|
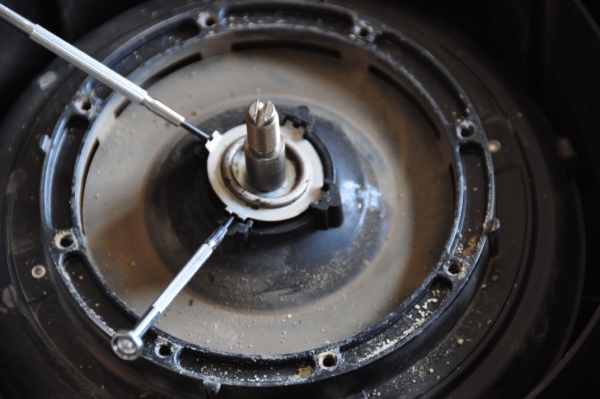
With
the metal motor gasket flange, spider, and plastic baffle plate removed,
you will need to remove the Bearing Retainer Shield and the Slinger Ring
washer underneath it (although it may be stuck to the Bearing Retainer
Shield's grease, and you might not notice it). Pry the ring up by placing
small screwdrivers in the openings provided, and pry up carefully on both
tabs at the same time. The Shield should pop loose as seen in the above
image. |
|
|
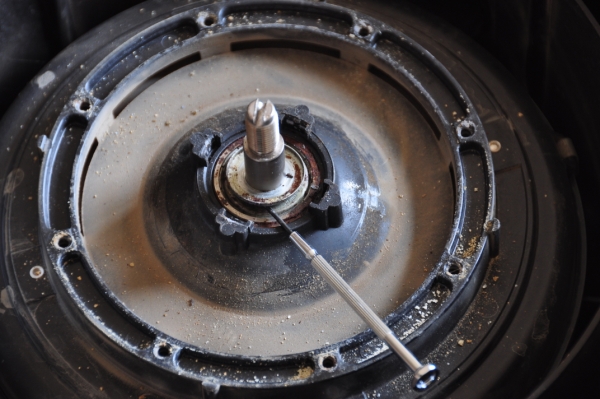
The
Slinger Ring washer is then carefully slid up the motor shaft to remove
it (if it was not already stuck to the Retainer Shield). |
|
|
|
|
|