How
to Solder Copper Plumbing Pipe / Fittings.
(How
to Sweat Copper with a Propane Torch)
Copyright
2008 Thomas Penrose
How
to Solder Copper Plumbing Pipe / Fittings. |
|
(How
to Sweat Copper with a Propane Torch) |
|
|
|
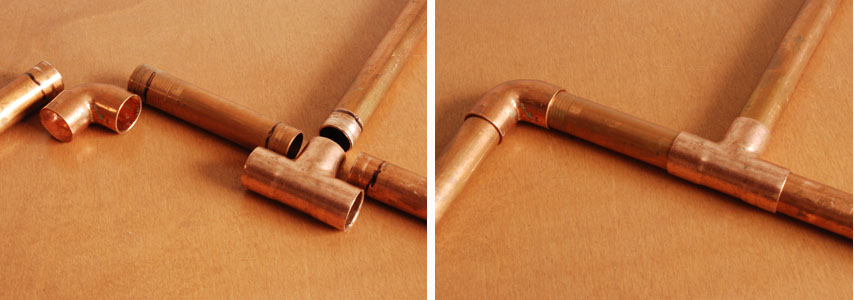
| Dry Fitting: When you are putting together a soldered project, it is best to cut all of the primary pieces beforehand, and then to dry fit them together, without using solder, in order to make sure that everything is going together as planned. When you cut the pipe you have to remember to leave enough length for it to seat within the female part of the pipe fitting that is being used. Typically, with 1/2" diameter copper fittings, the pipe will seat about 1/2" into the female fitting. This image shows the relative lengths of the pipe both before they are assembled together, and after. The black marker lines on the pipes represent the extra length that has been allowed so that there is enough pipe to fit within the fittings. | |
|
|
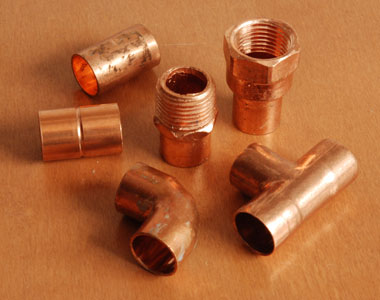
| There a numerous fittings that serve all kinds of functions -- too many to be shown in this article. However, some of the more commonly used fittings are shown here: A 90 degree elbow, two simple couplers for splicing pipe ends, a T-fitting, and male and female threaded fittings. | |
|
|
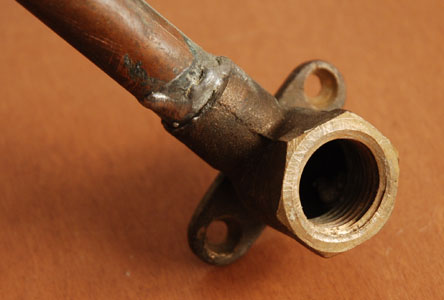
| Bronze fittings are also used with copper pipe. This is one that has "ears" that can be screwed solidly to part of the wood structure of a wall, so that the threaded pipe section cannot be moved or jiggled around. The shower head pipe coming out of your shower wall is most likely threaded onto something like this, which is why the pipe with the shower head on it feels so nice and solid when you go to adjust the shower head. When soldering a bronze fitting like this, it is important to direct most of the heat from the torch onto the fitting, since its large size will take longer to heat than the thin walls of the copper tubing. By the time the bronze fitting is hot, it will in turn have heated the tubing up as well, making both hot enough to solder properly. | |
|
|
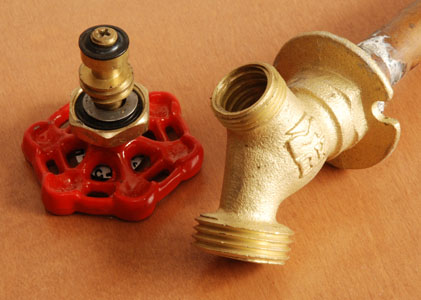
| Note that when working on faucets, shower valves, etc., they typically need to be disassembled before soldering them. This is because faucets contain rubber or plastic parts that would be damaged or destroyed by the heat from the soldering process. So, these rubber and plastic parts need to be removed first. | |
|
|
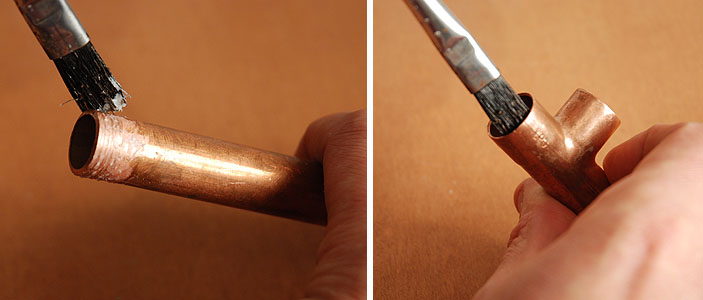
| Once you have cut and dry-fit the parts of your project, you can take them apart and start the process of soldering the parts together. Start by applying flux to both the male and the female surfaces that are to be soldered. If you are using a liquid flux (my personal preference), it is enough to simply use a flux brush and spread the fluid on the end of the pipe. The acid in the flux will immediately remove the oxidation from the pipe or fitting, making it as bright as a brand new penny. If you are using paste flux (as shown above), apply an even coating to the surface. Not too thick, but not too thin either. | |
| The informational content of this how-to website is not warrantied in any way or form, and any use of said content are at the reader's own risk, the author shall not be held responsible in any way for any damages or injuries arising from the content of this web site. Common safety practices are encouraged at all times, and the proper and safe use of all power tools and safety equipment (eye goggles, etc.) is the responsibility of the user. Additional How-To articles Here. | |
Copyright
2008 Thomas Penrose |
|